BLOG POSTS & ARTICLES
An Ultimate Guide to Coco Coir-based Cultivation

In recent times, the world of home gardening has witnessed a surge in popularity, driven by an ever-growing fascination with nature and eco-friendly living. As all gardening enthusiasts know, choosing the right growing medium is crucial for a flourishing garden. Whether you're just starting your gardening journey or have been tending to plants for years, there's one exceptional growing medium that stands out as a true game-changer: coco coir. This natural and versatile substrate has been gaining immense traction in recent years, capturing the hearts of both beginners and seasoned gardeners alike. Join us as we explore the A-to-Z of coco coir.
Definition and Origins of Coco Coir:
Coco coir, also known as coconut coir or coconut fiber, is a natural and versatile growing medium derived from the fibrous husk (mesocarp) of coconuts (Cocos nucifera). This renewable resource has been used for centuries in various parts of the world, particularly in regions where coconuts are abundant, such as Southeast Asia, India, and Sri Lanka. In recent years, coco coir has gained popularity worldwide due to its exceptional characteristics and eco-friendly nature.
The Process:
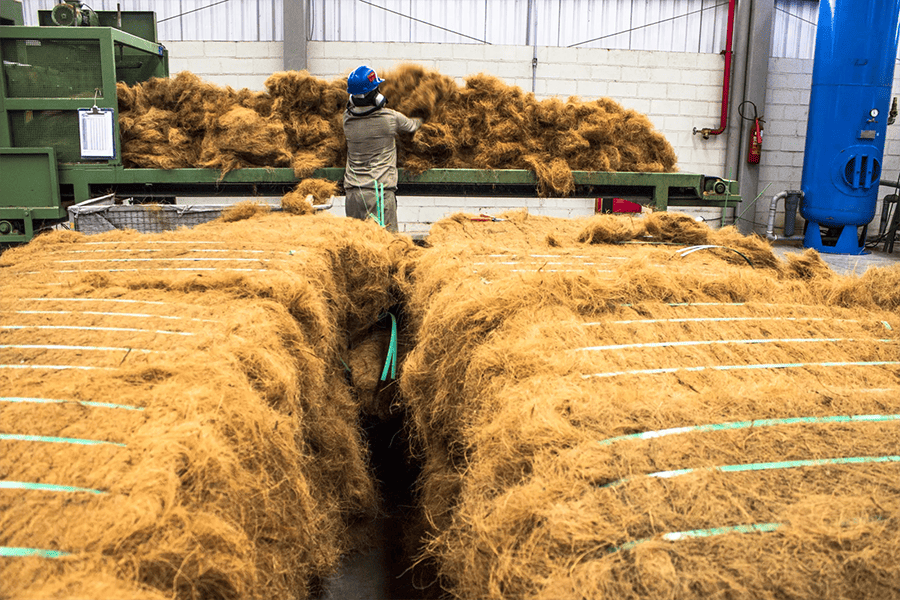
The production of coco coir involves several steps to transform the tough coconut husks into a fibrous material suitable for gardening and agricultural purposes:
Harvesting: Mature coconuts are harvested from coconut trees, and the outer husk is separated from the coconut fruit for further processing.
Retting: The husks are then left in water for several months to undergo a natural decomposition process known as retting. This process breaks down the lignin and cellulose in the fibers, making them easier to extract.
Extraction: After retting, the fibers are extracted from the husks either manually or through mechanical processes. The fibers are then cleaned and sorted to remove any impurities or unwanted particles.
Drying: The cleaned fibers are dried either in the sun or through mechanical drying methods until they reach the desired moisture content.
Sieving and Grading: The dried coco coir is sieved and graded based on the size and texture of the fibers. Different grades of coco coir are produced for various applications, such as seed starting, hydroponics, and soil amendment.
Properties of Coco Coir:
Texture and Structure:
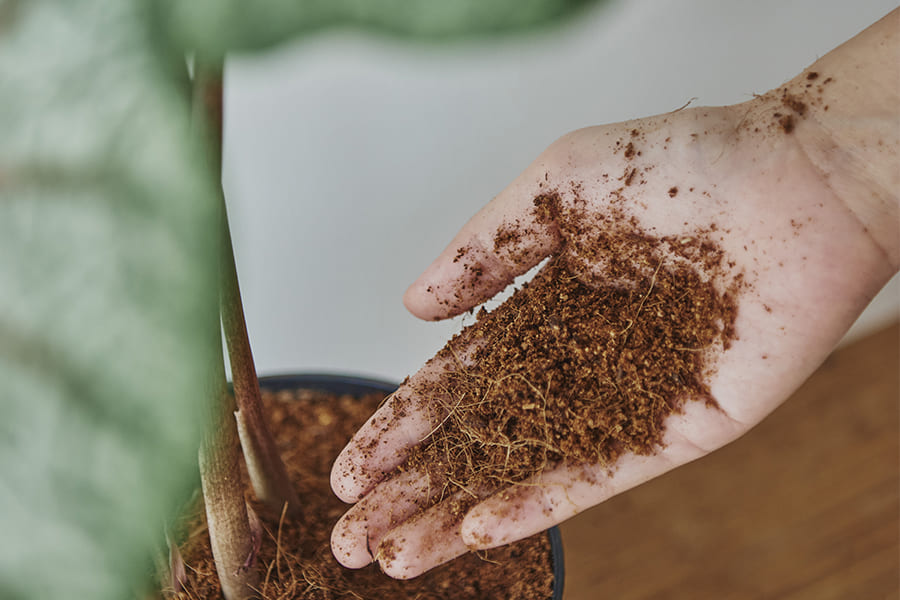
Coco coir has a fibrous and spongy texture, resembling fine coconut husk particles. The fibers are long, which contributes to the excellent structural integrity of the growing medium. This unique texture allows for better root anchoring and growth, promoting healthier and stronger plants.
Water Retention Capabilities:
One of the significant advantages of coco coir is its exceptional water retention capacity. The fibrous structure enables it to hold water efficiently while still allowing excess water to drain away. This property prevents waterlogging, which can lead to root rot, and ensures a consistent moisture supply for plant roots.
Aeration and Drainage:
Coco coir provides excellent aeration to plant roots due to its porous nature. The air pockets between the fibers allow oxygen to reach the root zone, promoting aerobic conditions that are crucial for root health and nutrient uptake. Additionally, coco coir's structure allows excess water to drain freely, preventing the medium from becoming oversaturated.
Different Types of Coco Coir Products:
Coco Coir Blocks and Bricks:
Coco coir blocks, also known as bricks, are compacted and dehydrated blocks of coco coir fibers. They are available in various sizes and can expand significantly when rehydrated. To use coco coir blocks, they are soaked in water until they expand to their full size. These blocks are commonly used for large-scale gardening and commercial agriculture, as they are easy to transport and store.
Coco Coir Pots and Grow Bags:
Coco coir pots and grow bags are popular choices for individual gardeners and small-scale growers. The pots are made from a mix of coco coir and other organic materials, molded into various pot sizes. They provide an excellent environment for seed starting and transplanting, as they can be directly planted into the soil without disturbing the roots. Grow bags are elongated bags filled with a mixture of coco coir and other components, designed for growing vegetables, fruits, and larger plants in limited spaces, such as balconies or small gardens.
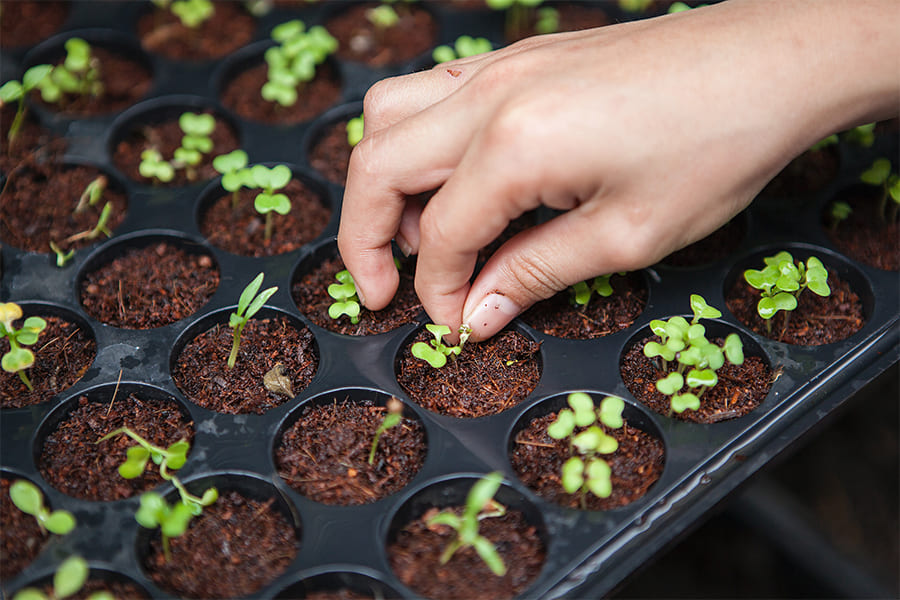
Coco Coir Pellets and Mats:
Coco coir pellets are small, compacted discs made from coco coir and are commonly used for seed starting. When water is added, the pellets expand, providing a convenient and space-saving medium for germinating seeds. Coco coir mats, on the other hand, are woven or compressed sheets of coco coir fibers. They are often used in erosion control, landscaping, and as weed barriers in gardening and agricultural applications.
Coco Coir for Planting:
Rehydrating Dried Coco Coir:
1. Dried coco coir, whether in blocks, bricks, pellets, or mats, needs to be properly rehydrate before use as a growing medium. Here's a step-by-step guide on how to rehydrate coco coir:
2. Choose a Container: Select a large container or bucket that can comfortably hold the amount of coco coir you want to rehydrate. Make sure the container is clean and free from any contaminants.
3. Add Water: Slowly add warm water to the container. The water should be at a temperature of around 70-85°F (21-29°C) for optimal rehydration. Use a volume of water that is about 3 to 5 times the volume of the dried coco coir you are rehydrating.
4. Allow Time for Expansion: Place the dried coco coir in the container with the water and let it sit for about 15 to 30 minutes. During this time, the coir will absorb the water and expand, breaking apart to form a fluffy, moist growing medium.
5. Break Apart the Coir: After the initial soaking period, use your hands or a gardening tool to break apart any remaining clumps and ensure uniform moisture distribution.
6. Squeeze Out Excess Water: Gently squeeze the rehydrated coco coir to remove excess water. It should be damp and evenly moist but not dripping wet.
Mixing Coco Coir with Other Amendments (Vermiculite, Perlite, etc.):
To create an ideal growing medium for your plants, you can mix coco coir with other amendments like vermiculite, perlite, or compost. This custom blend enhances the coco coir's properties and tailors it to specific plant needs. Here's how you can do it:
Choose Your Amendments: Select the appropriate amendments based on your plant's requirements. Vermiculite improves water retention, while perlite enhances aeration and drainage. Compost adds nutrients and organic matter to the mix.
Determine the Ratio: The ideal ratio of coco coir to other amendments depends on the specific needs of your plants and the characteristics of your growing environment. A common starting point is a 70:30 ratio of coco coir to amendments, but you can adjust this to suit your plants' preferences.
Mix Thoroughly: In a large container or wheelbarrow, combine the measured amounts of coco coir and your chosen amendments. Mix them thoroughly to ensure an even distribution.
Adjusting pH Levels:
Coco coir typically has a near-neutral pH, which is suitable for most plants. However, it can slightly vary depending on the source and processing. To ensure optimal plant growth, especially for plants with specific pH preferences, you can adjust the pH of the coco coir. Here's how:
Test the pH: Use a pH testing kit to measure the pH level of your rehydrated coco coir or the mixture containing coco coir and other amendments.
Acidifying: If the pH is too high (alkaline), you can acidify the coco coir by incorporating substances like sulfur or peat moss. These acidic amendments can help lower the pH to the desired range.
Alkalizing: If the pH is too low (acidic), you can alkalize the coco coir by adding lime or dolomite lime. These amendments will raise the pH to the desired level.
Mix and Recheck: After adding the pH-adjusting amendments, mix the growing medium thoroughly and recheck the pH. Repeat the process if necessary until you achieve the desired pH range for your specific plants.
Coco Coir Growing Challenges and Solutions:


__(3).jpg)